Colorizing the Prokudin-Gorski Image Collection
Background
Sergei Mikhailovich Prokudin-Gorskii was a Russian photographer who travelled the Russian Empire from 1909 to 1915, documenting many aspects of the country using his three-image photography method. He recorded three images of each scene, using a red, green, and blue filter in the hopes that Russian schoolchildren could learn about their country one day by viewing these photographs in color. Some of these RGB glass plate negatives were eventually purchased by the Library of Congress and are now available publicly. The process of colorizing the photographs, however, is harder than just superimposing the 3 filtered images since each image is slightly displaced due to the method by which the photos were taken. In this project, I automate the process of aligning the 3 images to produce a single colorized photograph. I also employ techniques from image processing to make the color photographs look cleaner and “better”
Single-Scale: Alignment Algorithm
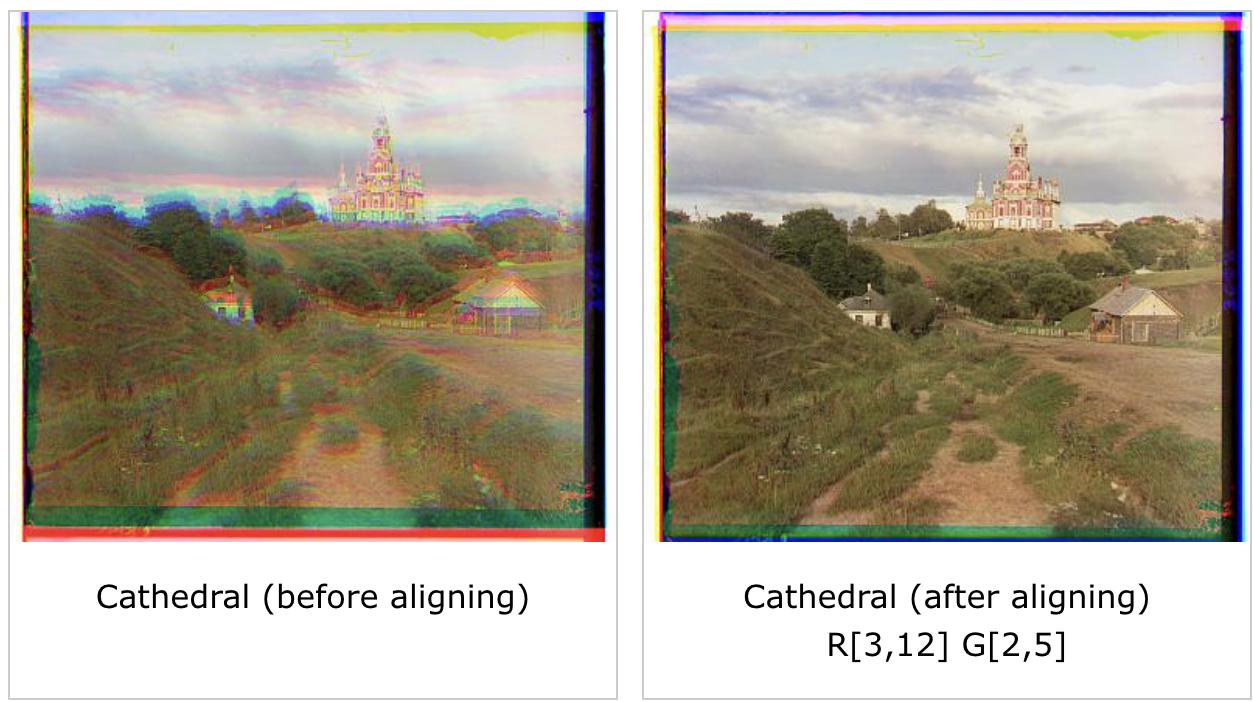
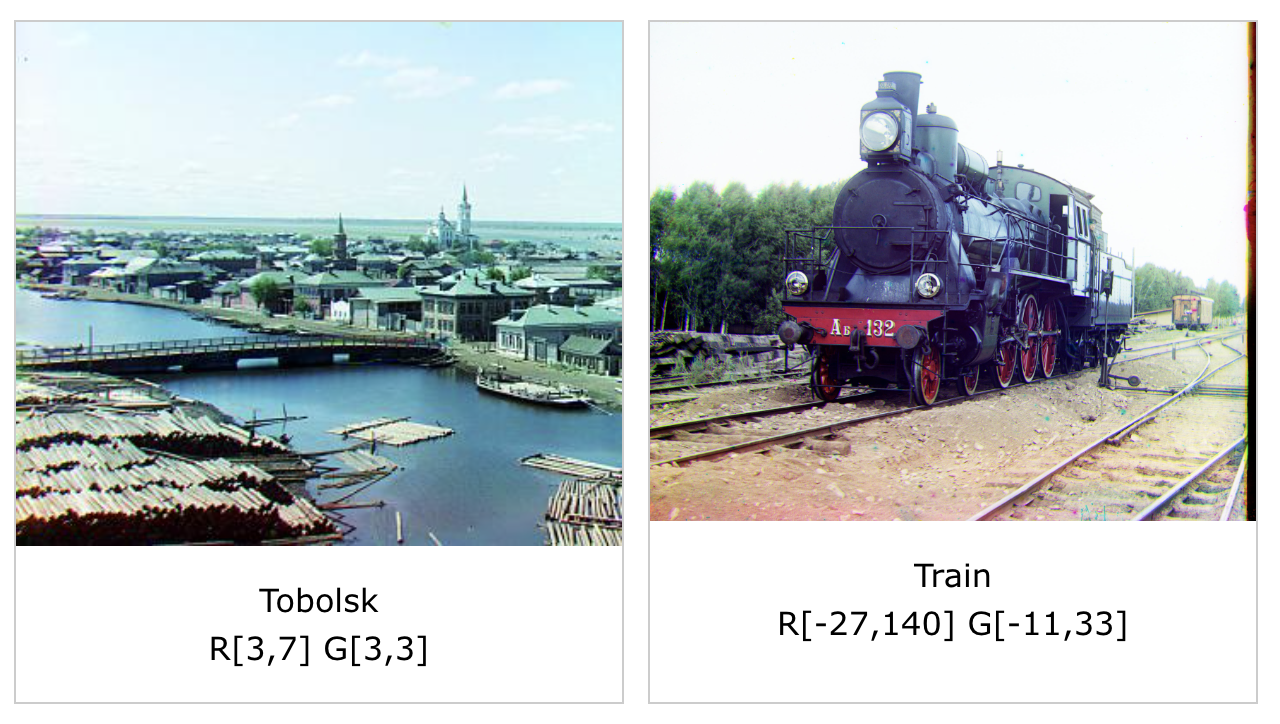
The core of my algorithm is pretty simple. I considered the blue-filter image to be fixed and aligned the red-filter and green-filter images to it via the following process. For each aligning image, I exhaustively search over a window of possible displacements ([-20,20] pixels to be specific) on both the x and y axes and use the normalized cross-correlation metric (NCC) to score each displacement. The displacement with the best score is what I eventually shift the image by to properly align it. One of the problems I ran into early on, however, was that this naive method produced alignments that were slighly off; you could see the blue, red, and green filters vary visibly in the final colorized photo. To fix this problem, for each displacement I cropped 20% off the border of both the aligning image and the fixed image so that the NCC metric would only be computed on the innermost parts of the images. This worked much better since we decreased the excess noise in the NCC metric caused by mismatched borders. The results of this single-scale alignment algorithm can be seen below:
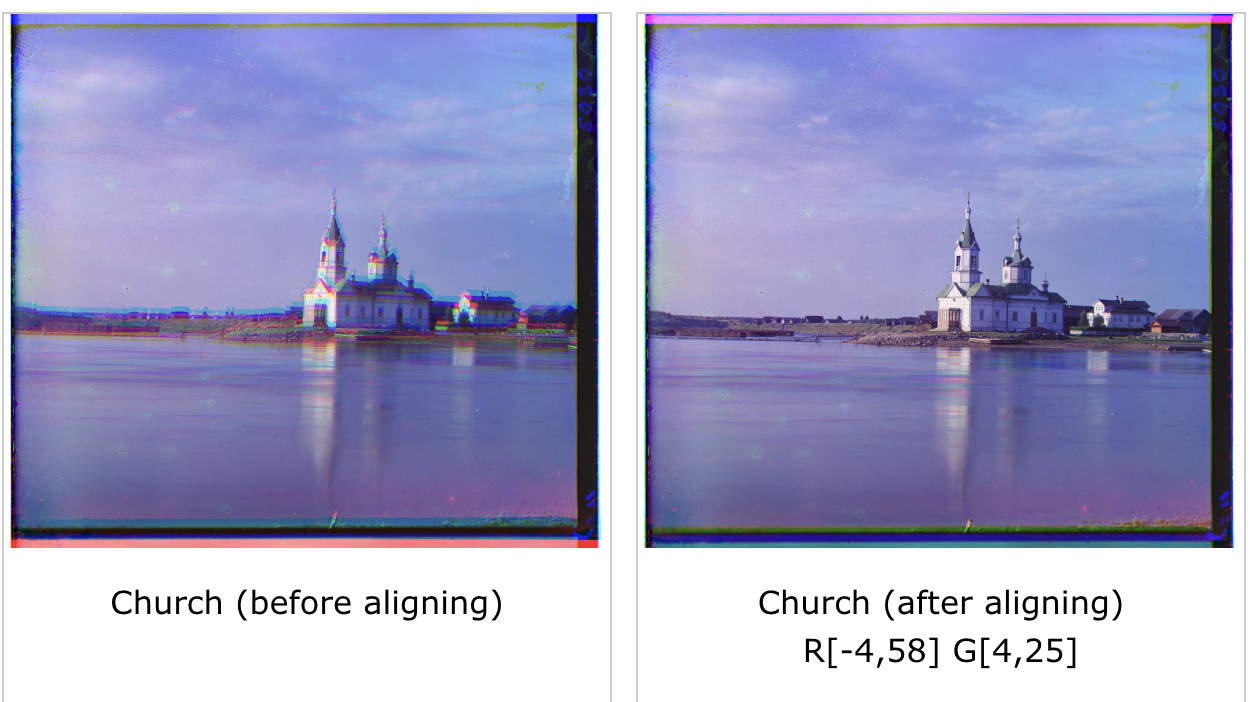
Note: R[x,y] indicates the red-filter image was displaced by x pixels horizontally and y pixels vertically to align it to the blue filter. G[x,y] means the same for the green-filter image.
Faster Search: Image Pyramid
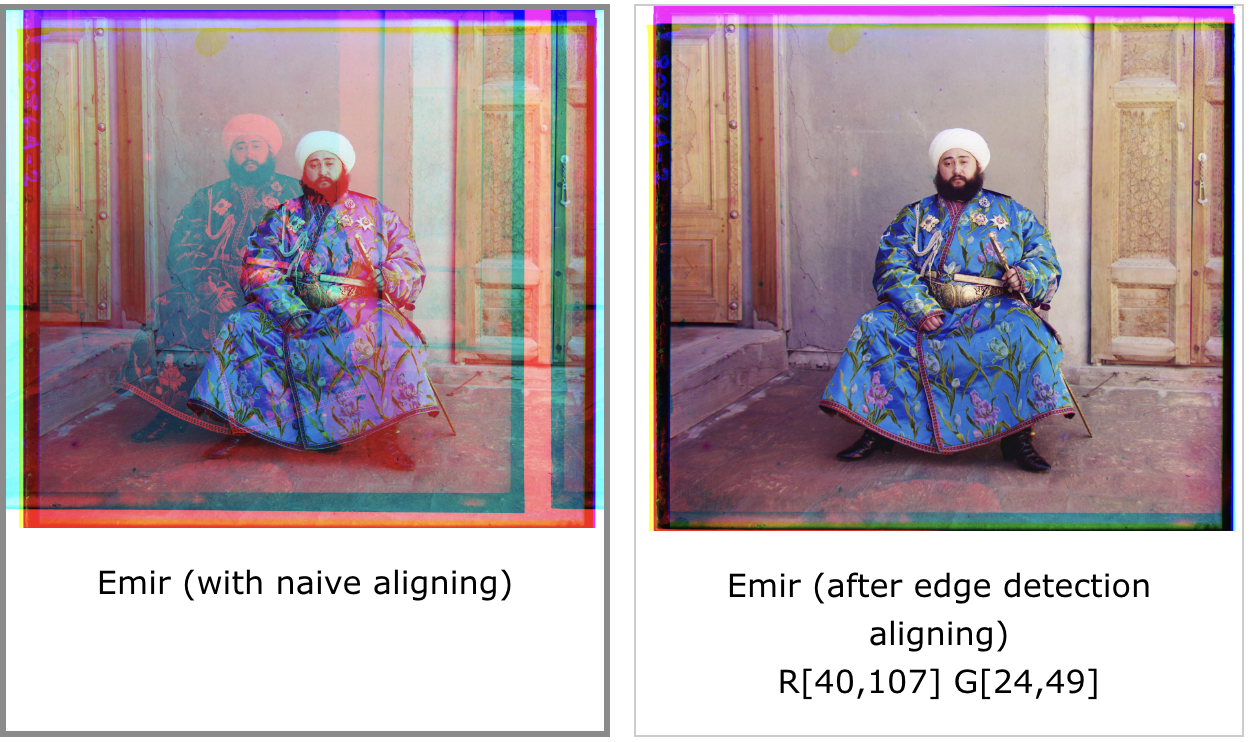
For larger .tif images, the single-scale procedure is far too slow since the window of possible displacements we need to search in is much larger. As a result, I used an image pyramid which stores smaller, scaled versions of the original image to make the search faster. For large images, I recursively rescale the both the aligning image and the fixed image by a factor of 2 (i.e. half each dimension) 4 times until the bottom level is reached. At that point, I run the single-scale alignment algorithm from before on the smaller images using the standard window of [-20, 20] pixels to estimate the best displacement. Then, for each return from a lower level, I find a slightly better displacement estimate by running the single-scale alignment algorithm, this time with a window of [-3,3] pixels from the displacement estimate found at the lower level (multiplied by 2 to account for rescaling). Essentially, this multi-scale image pyramid approach finds a good estimate for the displacement at the lowest scale and slightly refines it at each higher scale to get a better final estimate. Initially, I didn’t refine the estimate at each level and just used the estimate found at the bottom level (multiplied by 2 at each recursive return). However, I found that that this method caused the aligned images to be slightly off, so I implemented refining at each level which fixed the issue. I also tried different schemes such as increasing the window size for refinement and varying the window size based on the scaling at each level, but I found that these methods increased the computation time sizably or produced results that weren’t much better than the small window size of [-3,3] pixels. The results of implementing the multi-scale image pyramid procedure on large images can be seen below. Decent results were output for every image except “emir.tif” probably due to significant differences in brightness between its color channels. In the extra credit section, I explore a way to use edge detectors to fix this problem with “emir.tif” and even produce better alignments on other images.
Bells and Whistles
Edge Detection
To fix the issue with “emir.tif” and produce better alignment overall, I modified the single-scale alignment algorithm to run edge detection on the image first and then search over the displacement window. This has the effect of computing more accurate NCC metrics since edge detection eliminates the varying degrees in brightness between channels. I used a sobel filter to perform edge detection. Overall, aligning after edge detection gave noticably better results, especially on “emir.tif”
Automatic Cropping
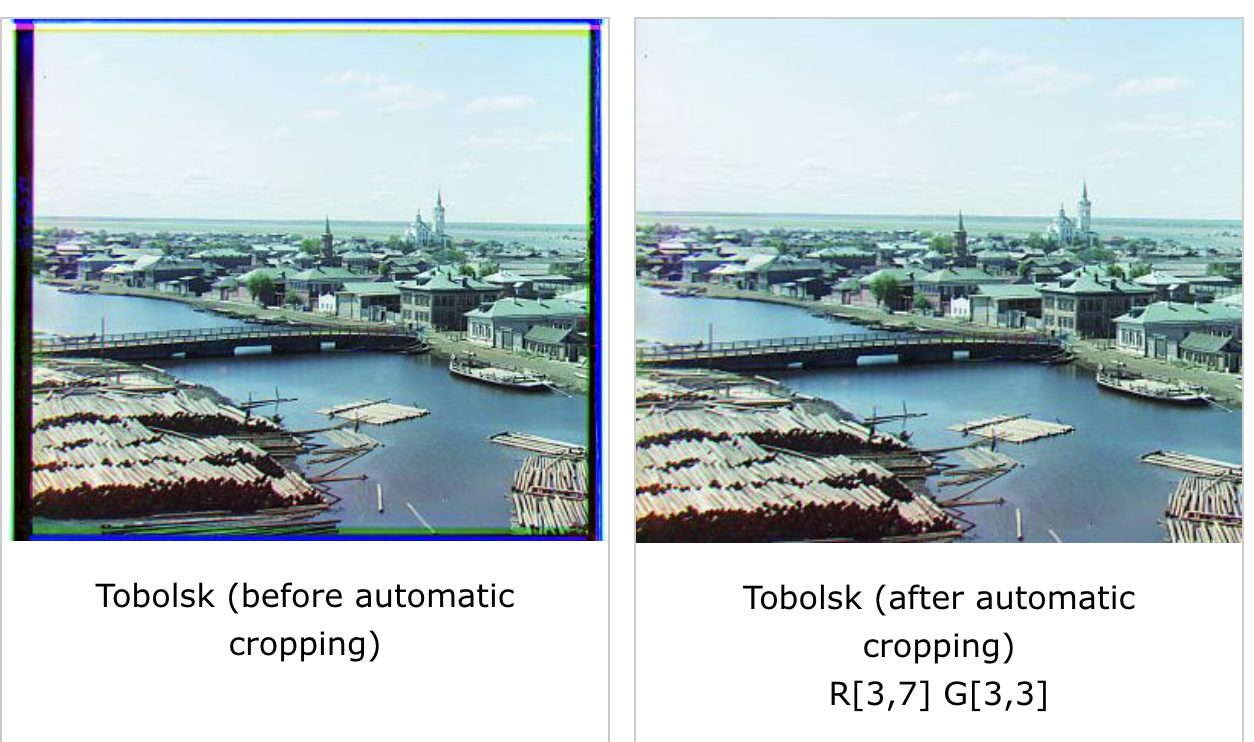
To improve the quality of the images after aligning, I also implemented automatic cropping of the black, white, and colored borders of the image. I performed two phases of cropping. First, before aligning the images, I cropped the black and white borders on each channel. To do this, I first ran edge detection on the image and, starting from the center, found bounds for the border of the image in each direction. I iterated through each row and column until I found one that has a percentage of “white” pixels above a certain threshold. A pixel was considered to be “white” if it had a value above a certain threshold close to 255. This algorithm essentially looked for straight white lines in the edge detected image, starting from the center. I ran this cropping procedure to find bounds for every channel of the image and applied the maximum cropping across the 3 channels at the end. The second phase of cropping came after the image was aligned. Shifting the channels after aligning caused colored borders due to the np.roll function so I cropped the image based on how much it was shifted. This only left the part of the image that all 3 channels agreed upon. Overall, automatic cropping worked well and produced significantly more aesthetic final images
Automatic Contrasting
To improve the quality of the images after aligning, I implemented automatic contrasting. This adjusts the intensity of the pixels across the across the image to achieve an even contrast throughout. Specifically, I found the intensity minval at the 2nd percentile and the intensity maxval at the 98th percentile and set all values below the 2nd percentile to minval and all values above the 98th percentile to maxval. Then, I “stretched” all values in between via the following formula: pixel(i,j) = (pixel(i,j) - minval)/(maxval - minval). Automatic contrasting produced better looking and sharper images in general as seen below.

Final Image Gallery


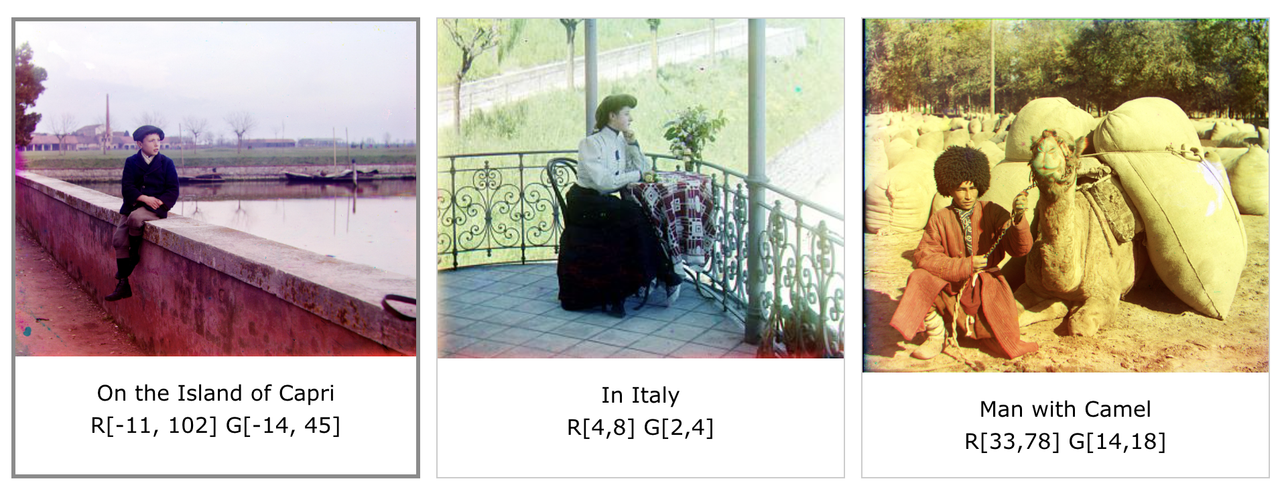
More examples of my own choosing from the collection
References
I referenced the following resources while completing this project:
This stack overflow post detailing how to adjust the contrast of an image using numpy. I used this post to write the automatic contrast function:
https://stackoverflow.com/questions/48406578/adjusting-contrast-of-image-purely-with-numpy
This W3 schools tutorial on how to create an image gallery in HTML. I used parts of the code to create this website:
https://www.w3schools.com/css/css_image_gallery.asp
This Medium blog post on image pyramids. I used this to learn more about constructing image pyramids:
https://medium.com/analytics-vidhya/a-beginners-guide-to-computer-vision-part-4-pyramid-3640edeffb00
This documentation on the normalized cross-correlation coefficient. I used this to write the formula to calculate the NCC metric:
https://xcdskd.readthedocs.io/en/latest/cross_correlation/cross_correlation_coefficient.html